
Well after the 6th , I will now have 2 kids in School Full -Time , its really bittersweet I'm happy for them since they will be around their peers and learning and frankly away from the electronics for more then 4 hours straight, But man I'm gonna miss them its always hard for me sending them to school if what was best for me (keeping them with me 24/7) was best for them. lol
So onto the Reason for my next project , So with School and Activity's we have so much paper work around here , So awhile ago I made just one of these Well I needed 3 and I wanted them all the same size so I couldn't use the one I made before anymore so I went to the basement to dig through my craft mess.
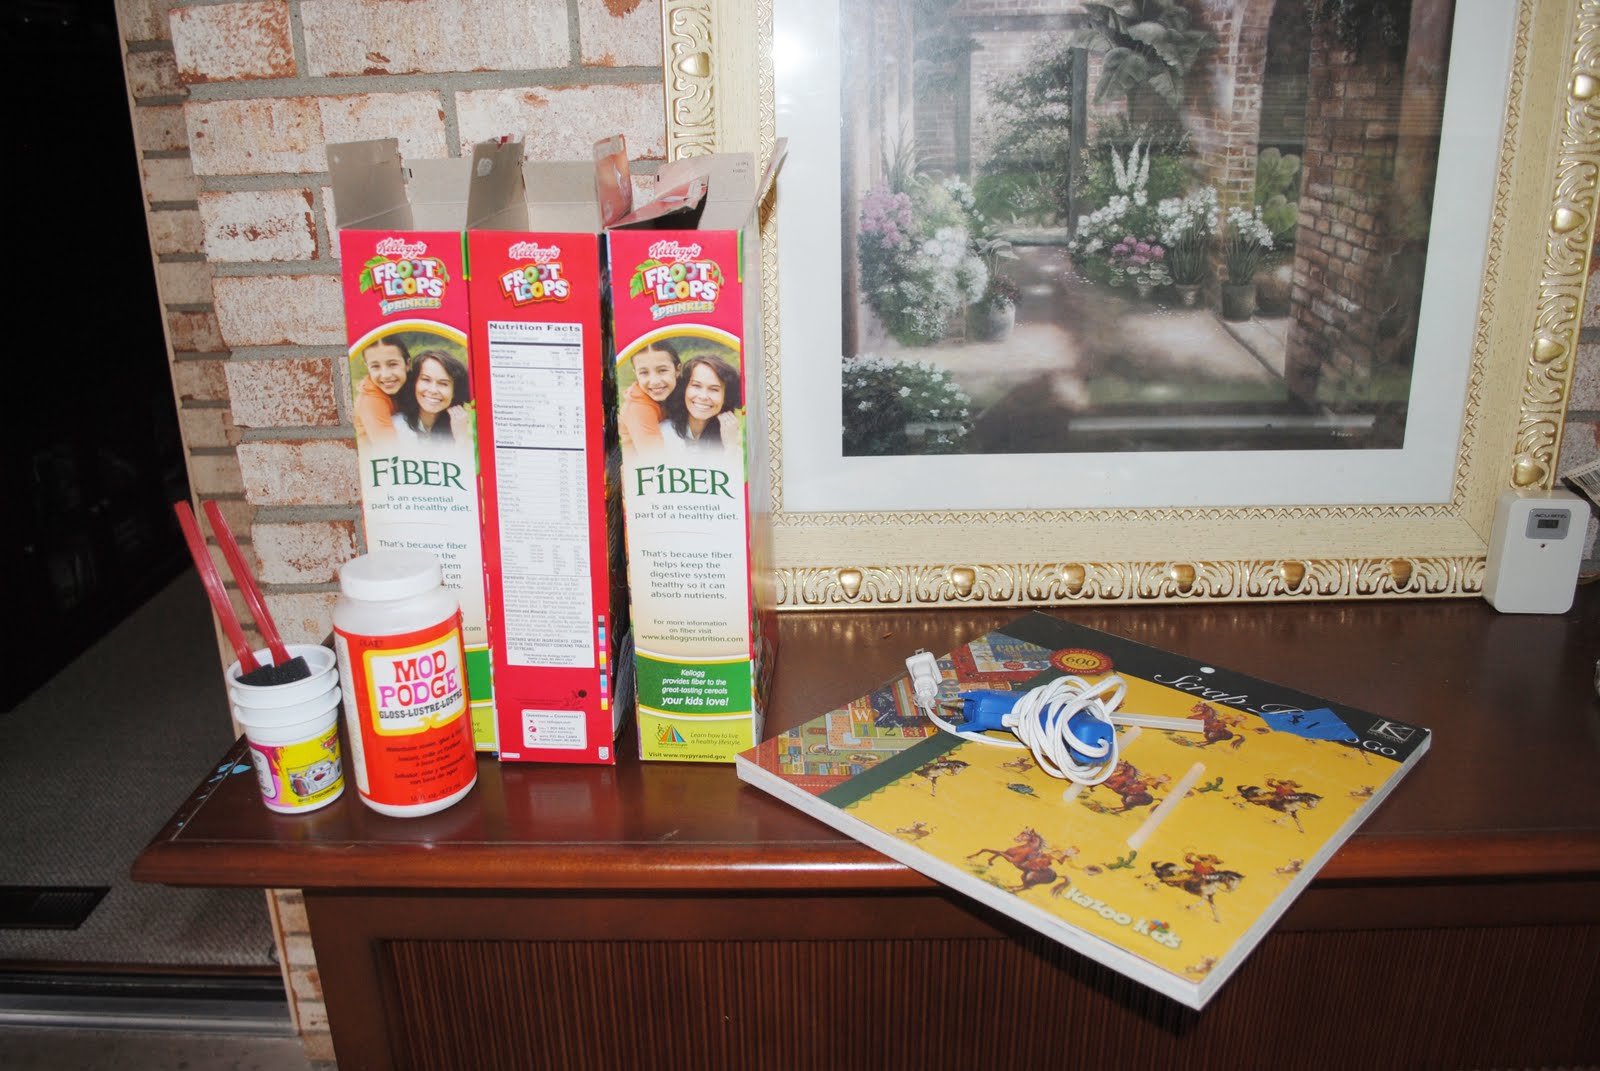
Supplies for Project:
- Mod-Podge (Always have some on hand )
- Foam Brush
- Cereal Box any size (I find as long as its bigger then the 11oz box)
- Glue Gun
- Old Yogurt Plastic Container
- 12x12 Paper (I used a total of 7 pieces.)
Step One :
Gather Up Your Supplies
Here is a Photo of What I have to work with ( I'm Making 3 )
Step Two :
Cut the Boxes , You want to start from a top corner and go Diagonally Across the Box like pictured below

Step Three :
Get Started
First I cut the Paper out and made a plan of how I wanted them to look and then you start using the Mod-Podge I like to first lightly coat where I'm planning to Lay my Paper out

Step Four:
Start applying the paper where you want it . I cut mine into Strips , After I laid a Strip down I would then put the mod-podge all over the paper , The box is not that sturdy so its also a good idea to press it firmly with your finger applying a couple light coats and then repeat for the rest of your design
Here are some Pictures along the way:


Here it is Done I let it dry for over a hour before the Next Steps

 |
| Sorry for the Dark Pictures I'm on Sons Computer so I cant edited them |

So I love them how they are however I wanted to add one more touch to mine a pencil holder in the front
Step Five:
I have a huge stash of these yogurt cups just waiting around for the right project and this was it .
So I took them and used the Mod Podge again to apply paper that matched my theme also added the boys first initial to the fronts


Step Six :
Then you get out the good ol' Glue Gun and Glue them on the front of your Box and you now are Finished with your paper box.


Now these are not very sturdy since the box is pretty thin , My mom had a good Idea to use left over shipping boxes , I might still try this for Hubby's office will post if it works out better, I hope you have enjoyed reading my How to Post
Idea: Would Make a Perfect Teacher Gift! Add some ribbon and some Pencils I'm sure any teacher would love it .

Love it!! I can't wait to see all of your other projects you will be doing and maybe someday I won't be so scared to try and be crafty..lol
ReplyDeleteHey this is really clever! So many possibilities!! Love it,
ReplyDeleteLina
Fancy Frugal life
Thanks Lina, its alot of Fun if I could find a box that is at least 12" Im thinking about making some for my 12x12 papers
ReplyDelete